This week’s lesson is probably the most fun part of making this quilt! Today I will focus solely on quilting decorative flowers in the center of the O’s (or in my case the space in between the x’s). Because of this, I’ve added on an extra week of quilting to this quilt along.

When I took Angela Walters‘ Quilting Negative Space class at QuiltCon, she showed us a quick sketch of how to make these adorable flowers. I was immediately struck and knew I wanted to use them in a future quilt along and asked her about that. She was cool with it. So here is my version of her “double flowers” and how I stitched them out.
 First, start quilting a little spiral in the center of the block. This does not have to be exact.
 Next, start “bouncing” off the spiral to create a few smooth petal shapes. You may or may not touch the center spiral and that is ok.
 For the second row of petals, try to echo the first row and stitch all the way to the space in between each petal.
 For the 3rd row, bounce around the petals again, but do not echo them exactly. You will have more petal “bumps” this time around.
 Echo the 4th row (and every even row), and connect your stitches in between each petal.
 On row 5 (and every odd row), bounce around again, creating more petals that do not connect to the centers.
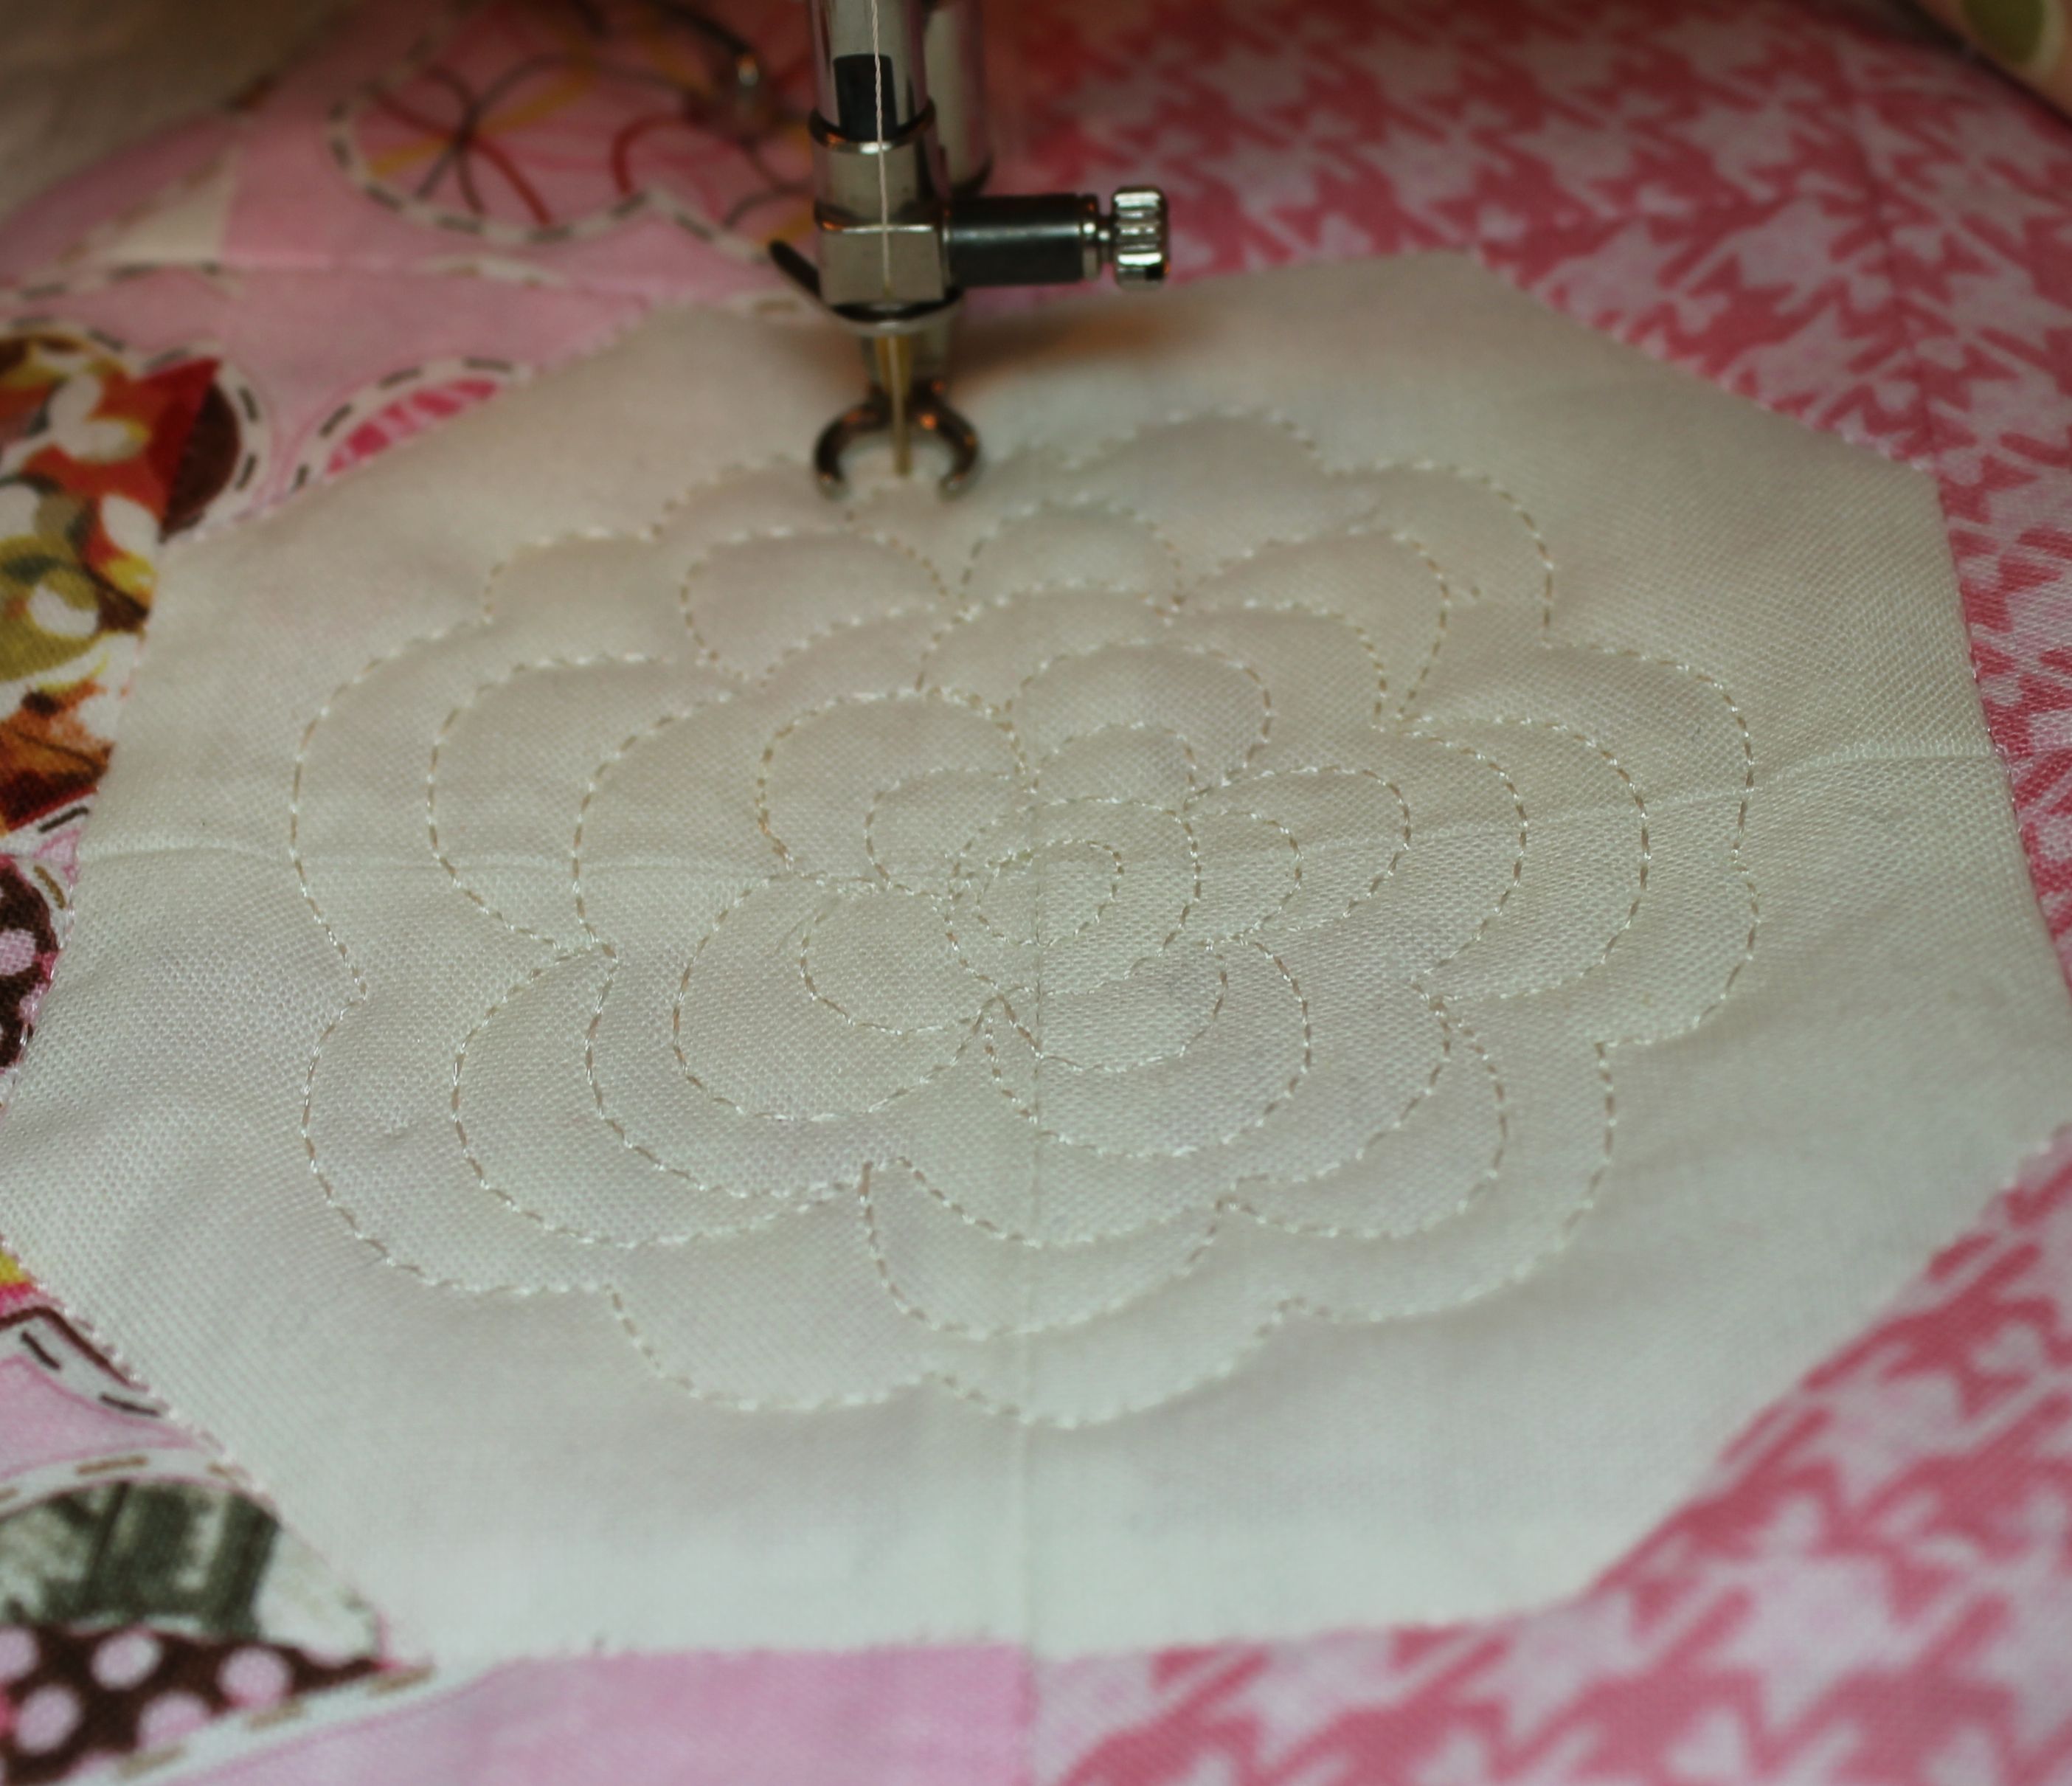
 Finish up by echoing row 6 and then going straight into a background design to fill the rest of the space (or add more rows of petals if desired). I quilted a close series of vertical lines all the way around each flower.
 Secure your threads and then move onto the next block. It took about 8 minutes to stitch out each flower, or a total of about 8.5 hours to quilt all of the centers. Do not rush it!
 For the borders, I marked the rest of the block outline, then stitched the same flower in the negative space. This took an additional 5 hours for all of the border flowers.

Here is a simpler quilting design I stitched on my original Hugs and Kisses Quilt. I used stencils to mark motifs in the middle of the O blocks plus the surrounding fabric. A fun fill such as pebbles or stippling would look great too!
Hugs ‘n Kisses Quilt Kits are available for purchase while supplies last. If you have any questions about this week’s homework, please be sure to join my flickr discussion, leave a comment, or email me directly at christa@christaquilts.com.
Quilt Along Schedule – Links will go to each active post when published.

Hugs ‘N Kisses 48″ x 64″
- 5.1 – 2/27/13 Supply List
- 5.2 – 3/6/13 Choosing Fabrics and Layouts
- 5.3 – 3/13/13 Cutting and Sewing the Bow Ties
- 5.4 – 3/20/13 Sewing the X and O Blocks
- 5.5 – 3/27/13 Finishing the Top and Borders
- 5.6 – 4/3/13 Piecing the Backing
- 5.7 – 4/10/13 Pin Basting
- 5.8 – 4/17/13 Stitching in the Ditch
- 5.9 – 4/24/13 Decorative FMQ
- 5.10 – 5/1/13 Additional Quilting
- 5.11 – 5/8/13 Binding – It’s Finished!
Grab my Quilt Along button!

<div align="center"><a href="http://christasquiltalong.com" title="Christa's Quilt Along" target="_blank"><img src="https://christaquilts.com/wp-content/uploads/2013/03/christas-quilt-along-175-2.png" alt="Christa's Quilt Along" style="border:none;" /></a></div>

That is a gorgeous quilting design. I really want to give it a gobut need to finish up a couple of other quilts first.
What a beautiful quilting design and perfect for your quilt! Thanks for showing all the steps!
Thanks for sharing.
Freemotion by the River Linky Party Tuesday
I have made a version of this and I love making these flowers, they really stand out on a quilt yet don’t detract from the piecing.
The flowers are a great choice for the quilt – thanks for the tutorial!
Those flowers are great! I like how to have time estimates.
I love it! It’s so adorable!
Thank you for sharing. The flower is so cute. I just signed up for her class on negative spaces on Craftsy.
I took Angela’s class too … Love your pretty version of her flower!
The continuing of the flowers into the borders really completes it for me… great job!
Really beautiful quilting!
These flowers really enhance the quilt! The thread has a lovely sheen. Can you tell me what you are using?
Sure – Glide polyester thread. It’s wonderful and doesn’t break!
Christa, these roses are lovely! I’m going to have to try it (yeah, right. =)
Darling design and beautiful quilt pattern. I love it!!!
Wonderful pictures today…very inspirational. I just cut a jelly roll on the weekend and have started my piecing of the bow tie blocks for a Hugs and Kisses quilt. Love your QALs!
Hi it’s Linda again! Are you using a stitch regulator? Like the BSR on Bernina’s? I do not have one and am struggling with uneven stitches? Maybe just need more practice? Thanks!
No stitch regulator – just lots of practice and a “feel” for how to form the stitches. Using polyester thread helps, too.
HI! THIS POST IS SO SO ENCOURAGING TO ME! I’M WANTING TO DO SOMETHING A LITTLE DIFFERENT WITH MY FM AND I THINK I CAN PRACTICE THIS FLOWER AND PULL IT OFF ! YOURS IS JUST DELIGHTFUL ♥ (THANKS FOR “ALL” THOSE PHOTOS!)
gorgeous quilting
WOW–This looks amazing! Love the flower you quilted inside—really adds character! Very nice and thank you!
Wow! I’m impressed and thank you for the step by step. How do you keep your stitches so even? I’ve been practicing but that’s the most frustrating part for me, I hate uneven stitches :-|.
Lots and lots of practice! Plus I slow down and stitch a little slower so I have more control.
I love your quilting! You have great ideas!
Looking wonderful, your quilting is amazing…..loving it!
Nice tutorial! Love those quilted flowers 🙂
Gorgeous! It’s like a little surprise!
Great quilting design ideas! I still need to sew my blocks together
Thanks for the inspiration!